Introduction
Installing a wireless network eduroam at Windows 7 is similar to the installation at Windows Vista.
Installation and connection to the Faro-free network
At first we begin with the setting the start menu icons near the clock active, click on the Network Connections icon.
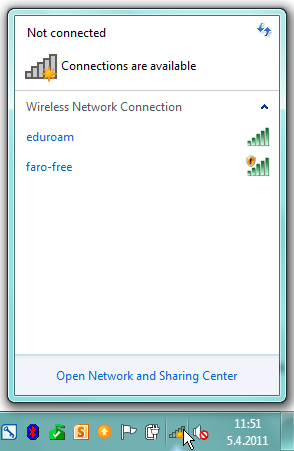
In the Wireless Network Connection choose faro-free network and click on Connect.
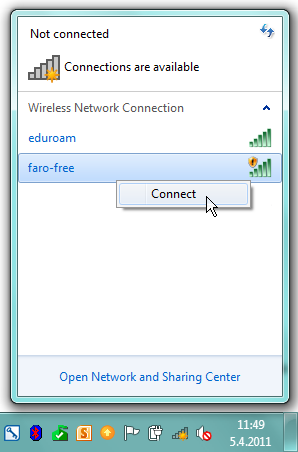
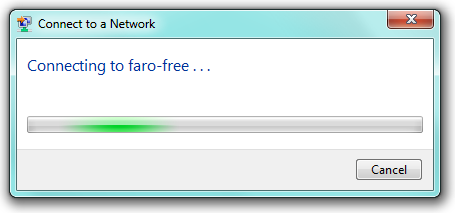
Now the connection is being established.
The connection can be checked in the Wireless Network Connection.
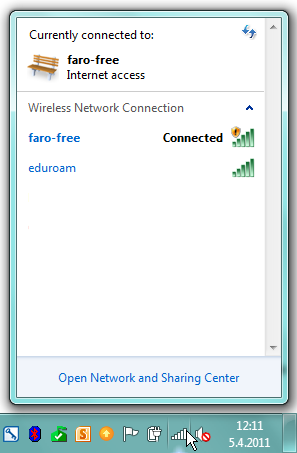
Running the Faro-free network
After successful installation of a wireless network card, a wireless connection to the network and a connection to the Faro-free network, you can start using the services of the UIS (University Information System) you are used to.
So you can open your favourite Internet browser (Mozilla, Opera, Internet Explorer, etc.) and typehttp://is.mendelu.cz on the address line and start using the University Information System. Access to pages other than the University Information System from the Faro-free network is not allowed!
Installation and connection to the Eduroam network
As mentioned before, Faro-free network is freely available and allows any user to connect. In contrast, the Eduroam network is intended just for registered users of the network of MENDELU and for visitors from other universities who can connect to the network through the certificate from their home institution, which is a participant in the Eduroam project. Likewise, our users with the certificate of MENDELU can access the eduroam network at partner universities. Thanks to authentication at the home university the network provides access to a full range of Internet services and resources.
To get connected to the eduroam network you need a valid root certificate of your home university (in this case MENDELU) and a personal certificate. Both of these certificates are to be found, generated and installed from the University Information System.
The first step is to log in to the University Information system (UIS). A brief set of instructions on how to log in to the UIS for the first time is available in the publicly accessible part of the UIS Personal Administration First log in to UIS instructions . Detailed documentation is to be found in the publicly accessible part of the Document Server called UIS Documentation Official documentation.
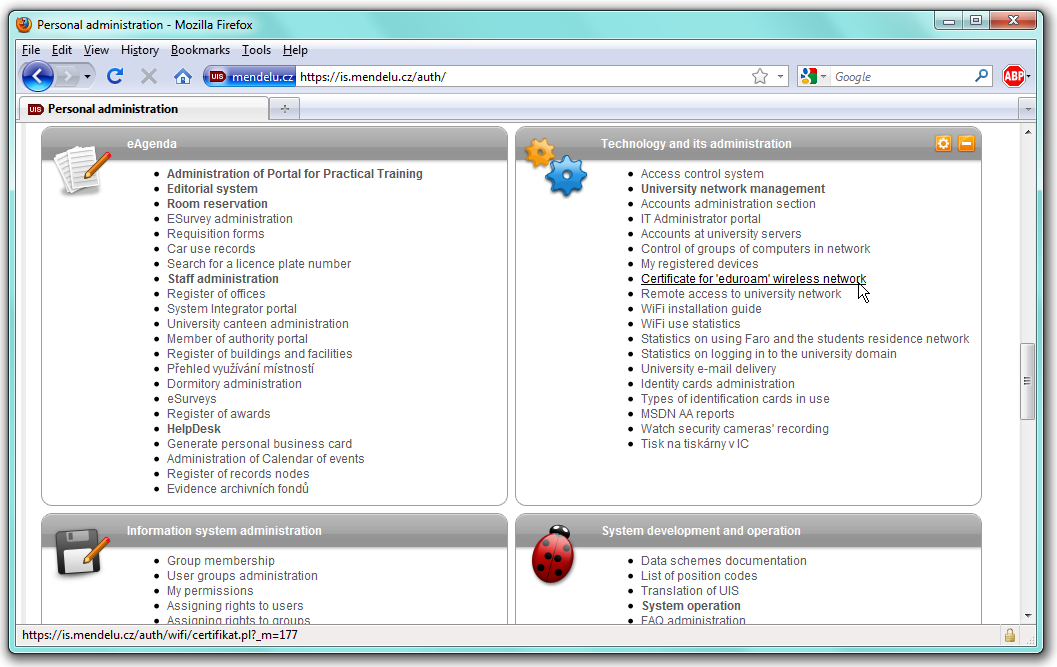
After you have logged in to the Personal Administration go to Technology and its administration and choose Certificate for 'eduroam' wireless network.
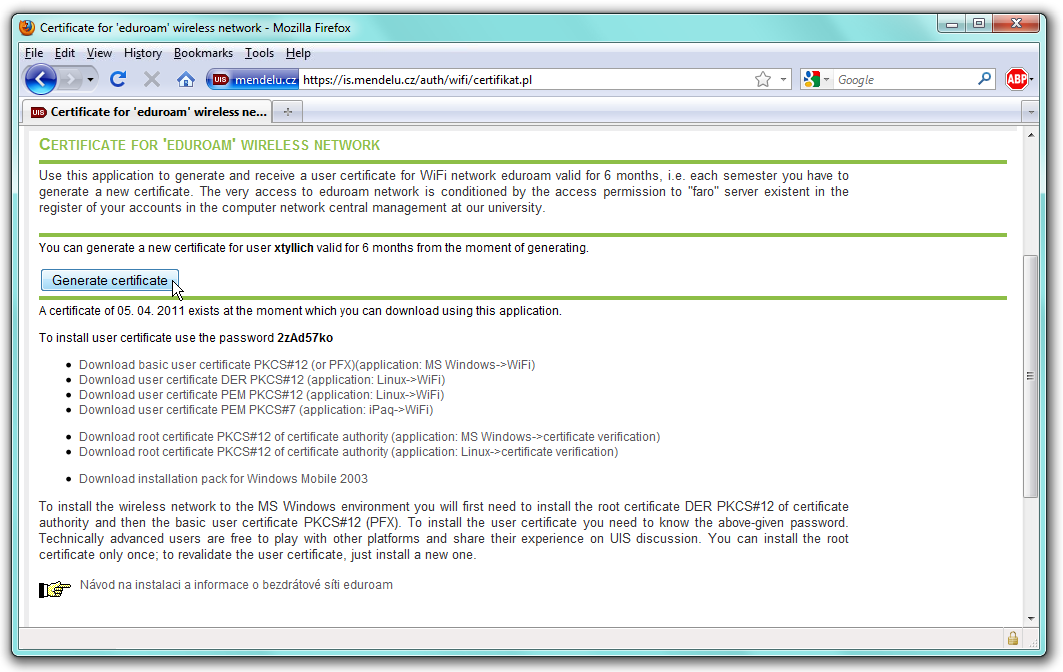
Now, this application allows you to generate a password and install user's certificates. At the top of the page there is the Generate Certificate button which allows you to generate a password to your certificate which will be necessary for its installation. The new certificate which is valid for one year is displayed in the middle of the page.
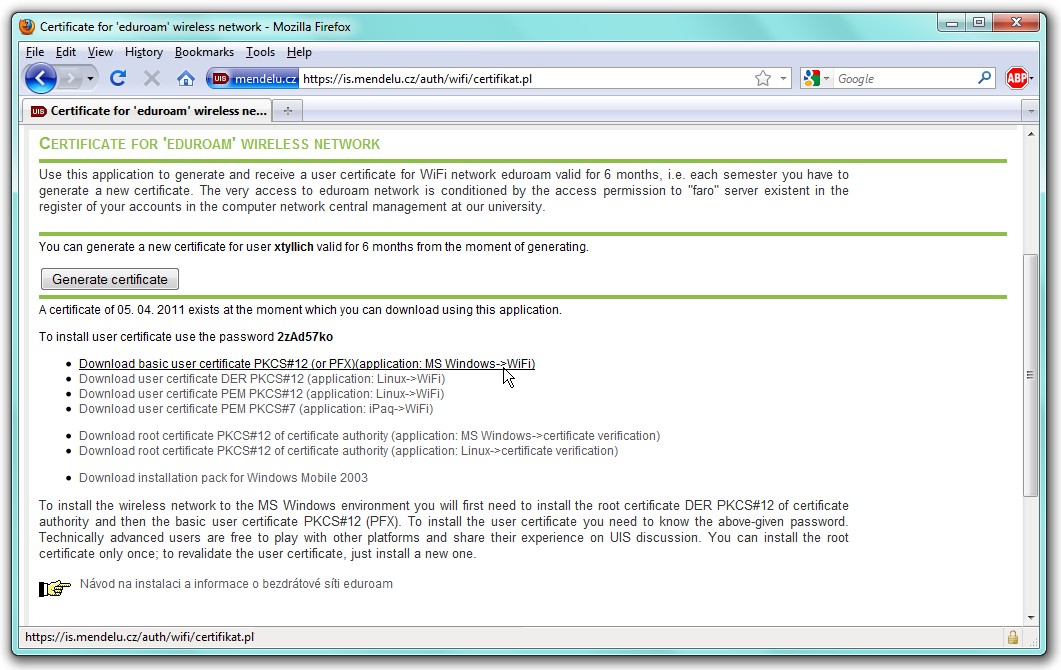
Then it is necessary to install the root certificate DER PKCS #12 of the certification authority which is found in the other group of links (see picture).
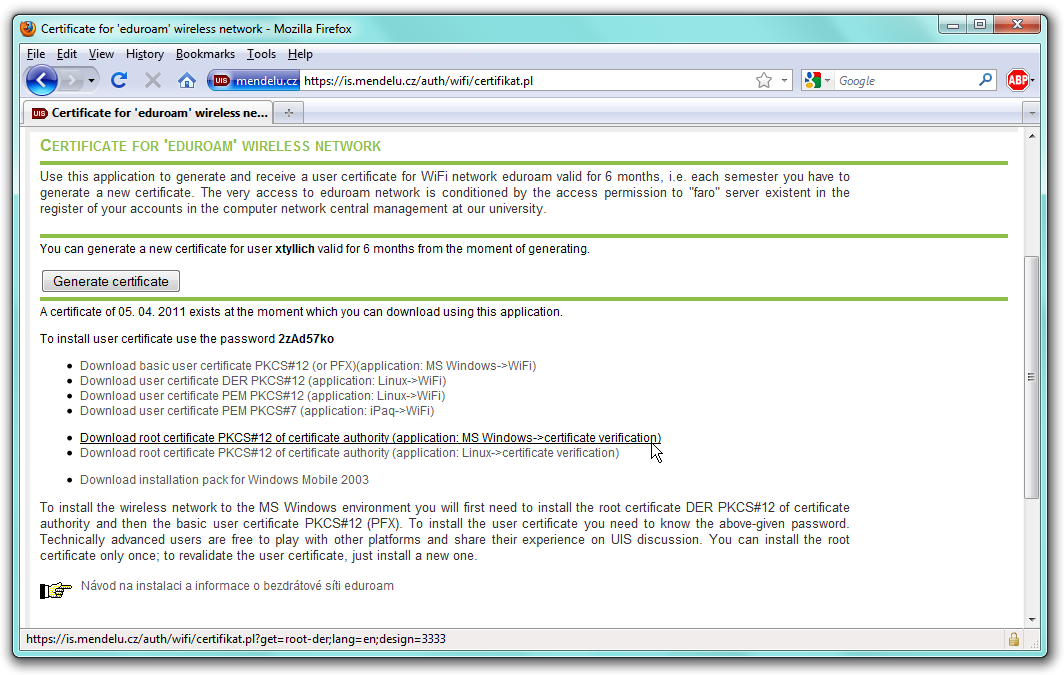
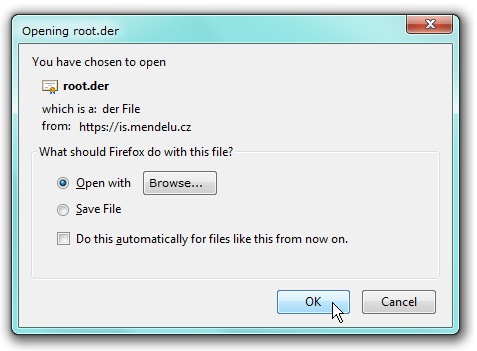
Click the SDownload the root certificate PKCS #12 DER of the certification authority button and then choose Open. Then choose Unblock when the security alert message appears. If the browser does not offer the option Open you can store the application on the hard drive, e.g. on the desktop. By clicking the certificate icon on the desktop start certificate installation. In the Certificate window, choose Install the certificate.
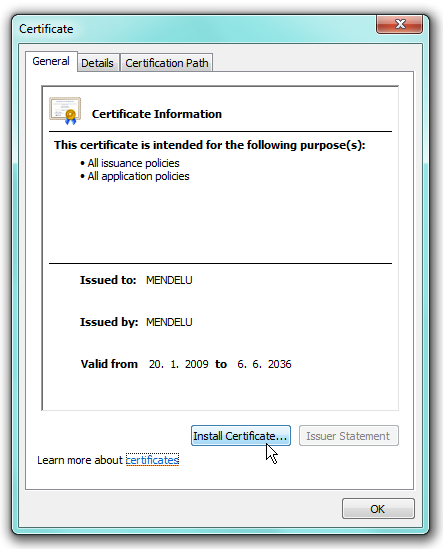
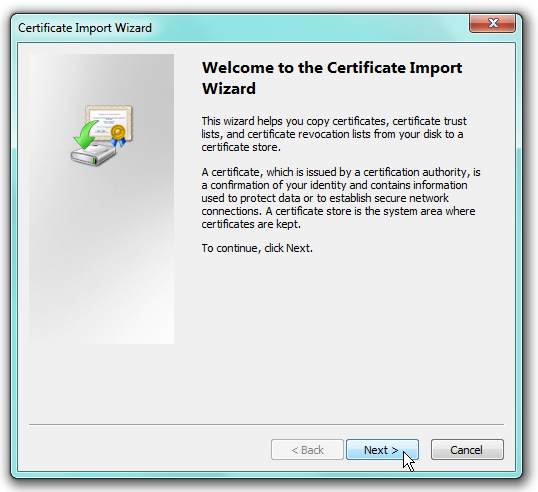
Now, go to the Certificate Import Wizard and choose the Next button to continue.
In the next screen select Place all certificates in the following store, then click Browse, and select Trusted root certification authorities.
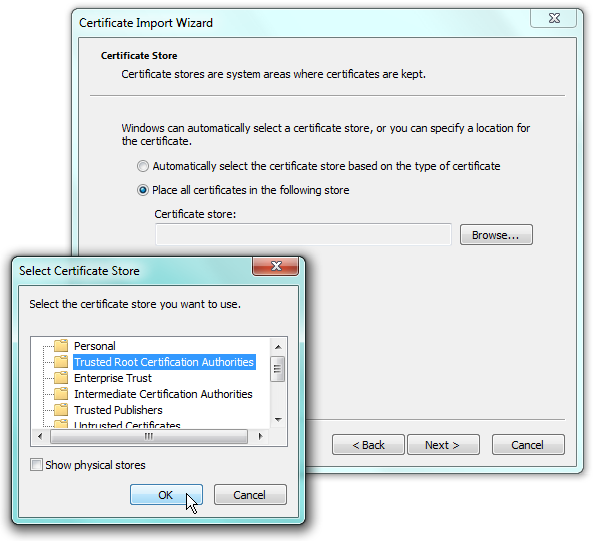
Select OK for the store you chosen. To continue click on Next
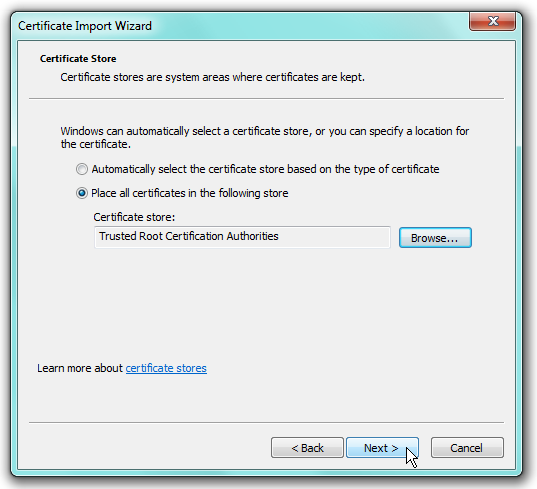
Complete the Certificate Import Wizard.
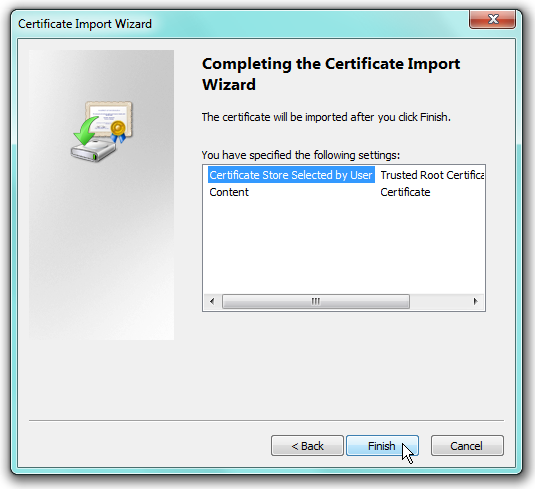
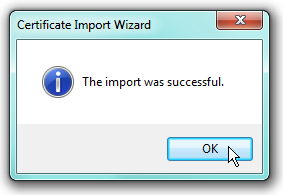
According to the security level MS Windows 7 will ask you if you really want to install the certificate of the Certification Authority MENDELU and you click Yes. The entire import is confirmed in the dialog window.
Another stage of the installation of eduroam is the import of user's basic PKCS#12 (PFX) certificate. In the basic application choose in the first group of links Download user's basic PKCS #12 (PFX) certificate.
The installation procedure is similar to that of the previous certificate. A significant difference is that in the certificate import procedure you will need a password which has been generated before.
First choose Open in the Download the file window and then Next in the Certificate Import Wizard.
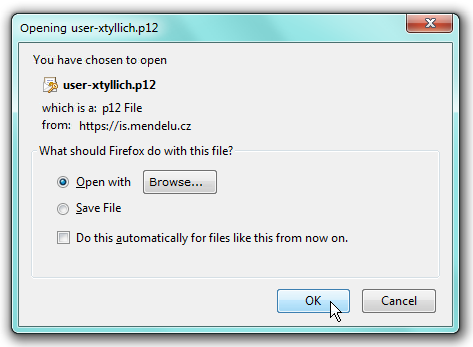
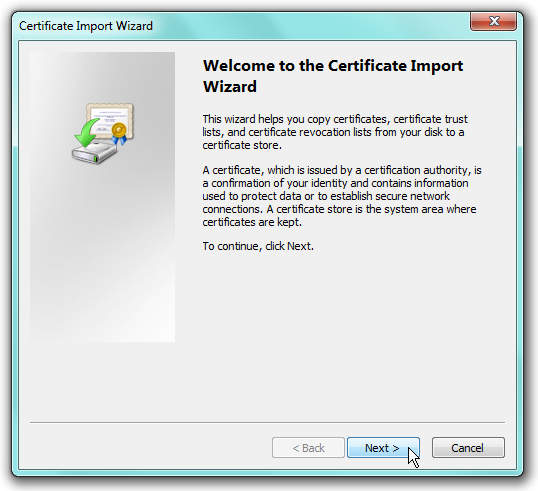
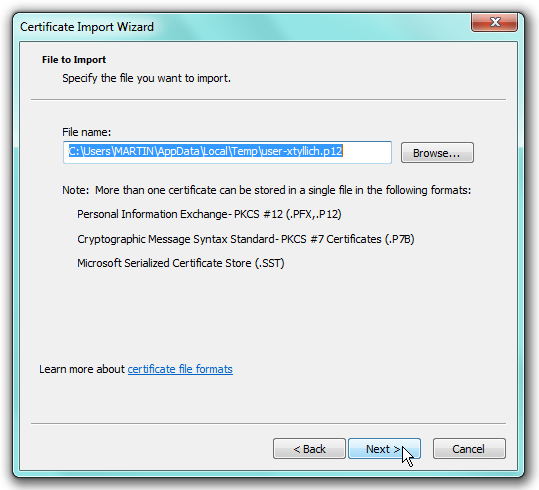
Then choose the file containing the certificate you want to import and click Next.
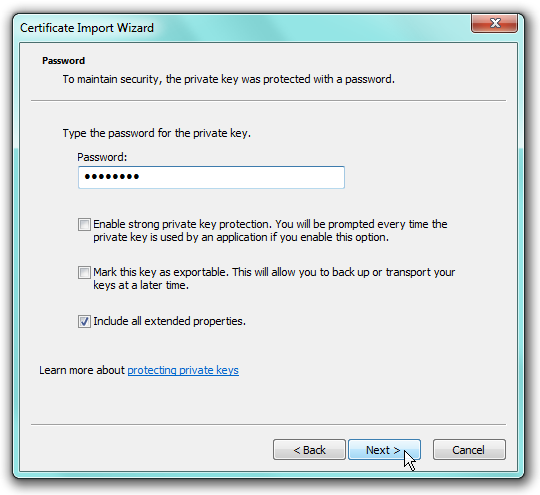
Type the password that has been generated for the certificate. The password has to be typed. It cannot be copied and inserted into the box.
In the next screen, like in the case of the root certificate, it is recommended to choose manually Place all certificates in the following store, then choose Browse and select the certificate store to use and then choose Personal.
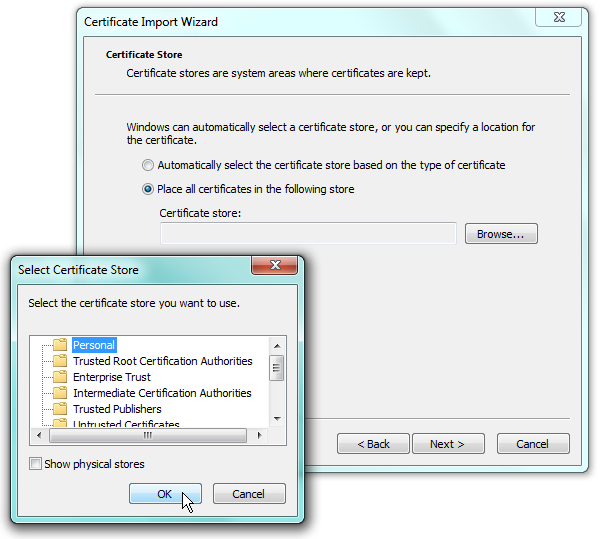
Select OK for the store you chose and click on Next
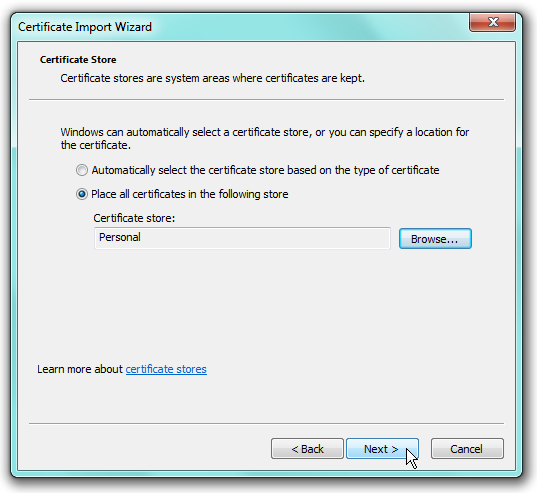
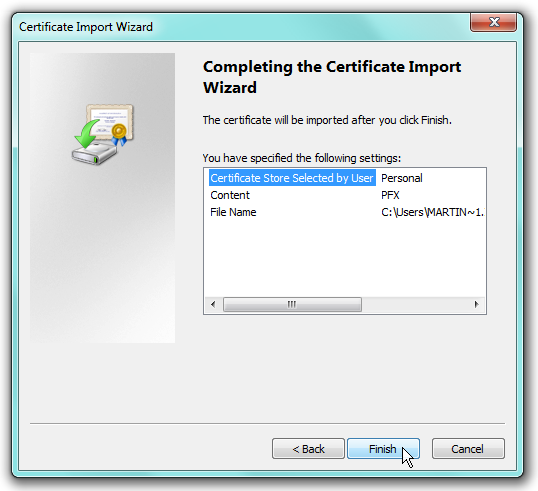
In the next screen confirm Complete Certificate Import.
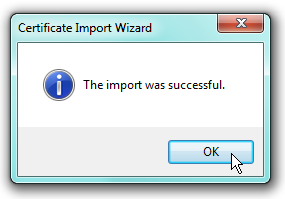
A message about successful completion of installation is displayed in the dialog box.
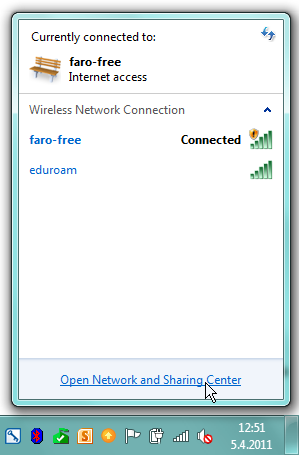
Now both certificates of MENDELU which are necessary for the connection to eduroam have been successfully installed in the computer. Now you have to set up the wireless client to use the certificates when the connection is established. Now go to the system of active icons next to the clock and click on the icon Wireless Networks and then go to Open Network and Sharing Center
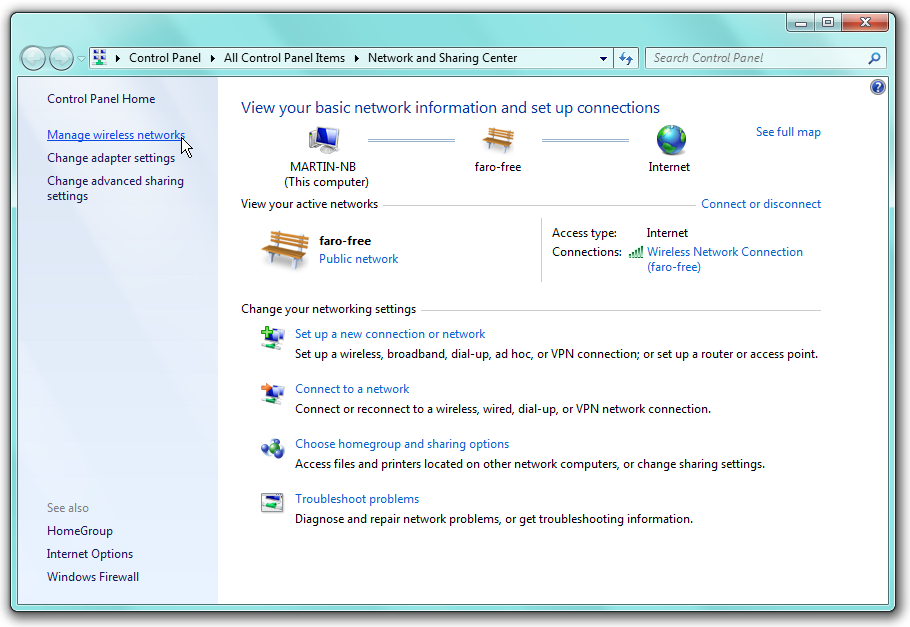
In the left column click on the link Manage wireless networks.
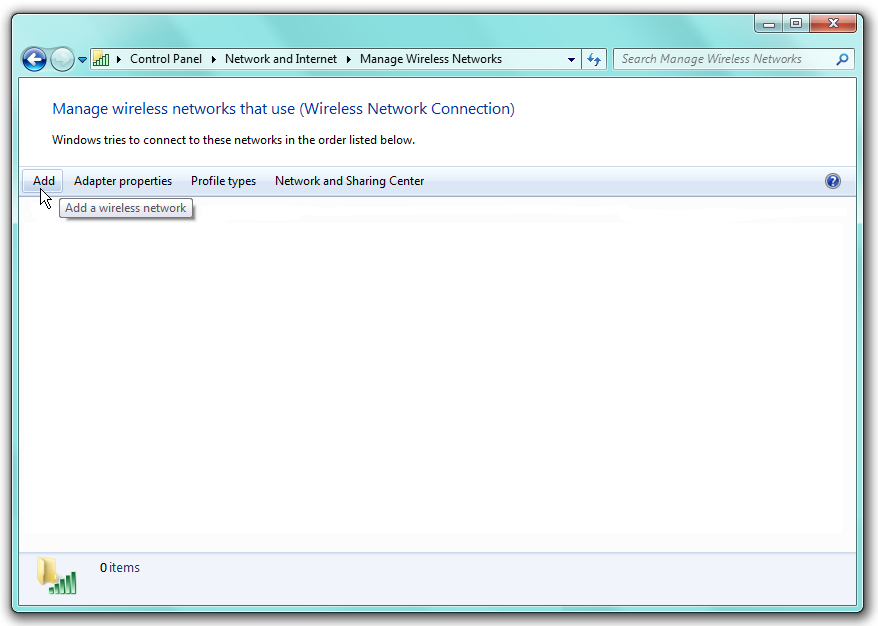
In the window click on the Add button for adding wireless network
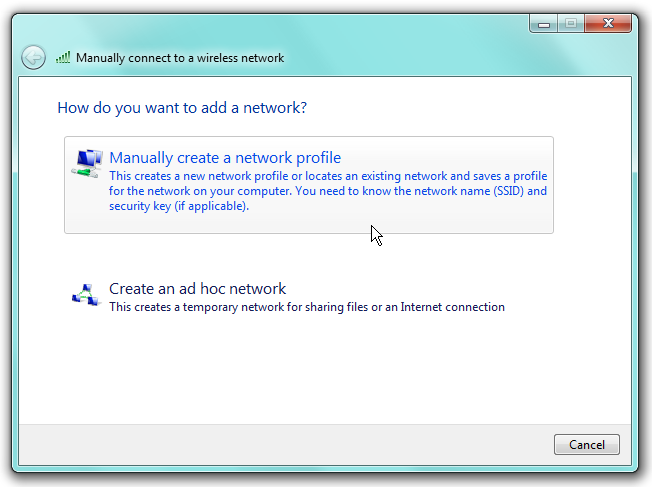
In detailed settings select Manually create a network profile
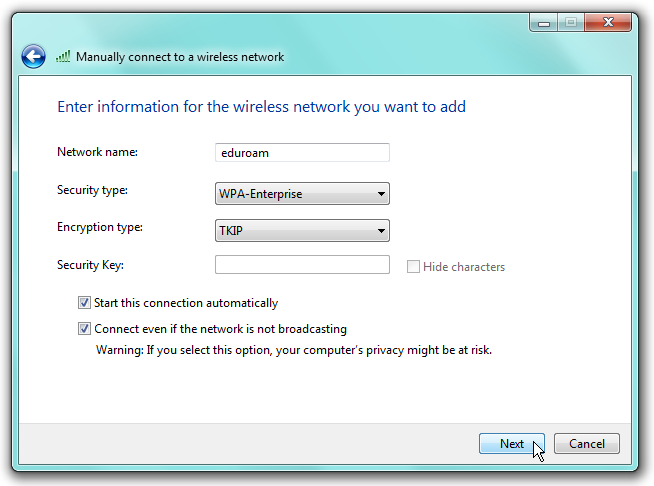
In the next dialog box enter the following information to add the new network:
- Network Name: eduroam
- Security Type: WPA2-Enterprise
- Encryption Type: AES
- Check
- Start this connection automatically
- Connect even if the network is not broadcasting
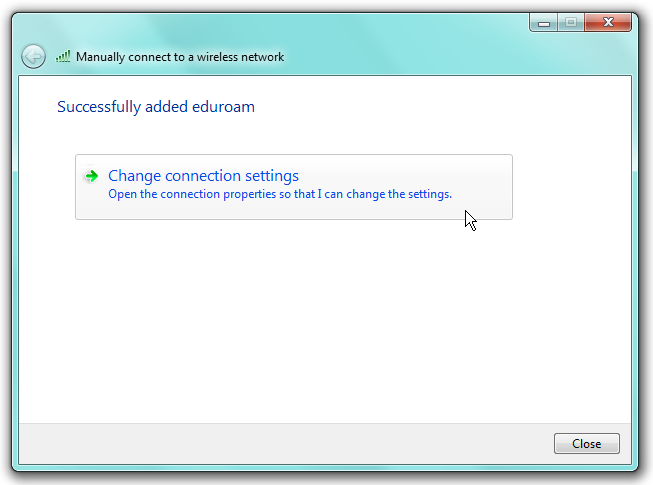
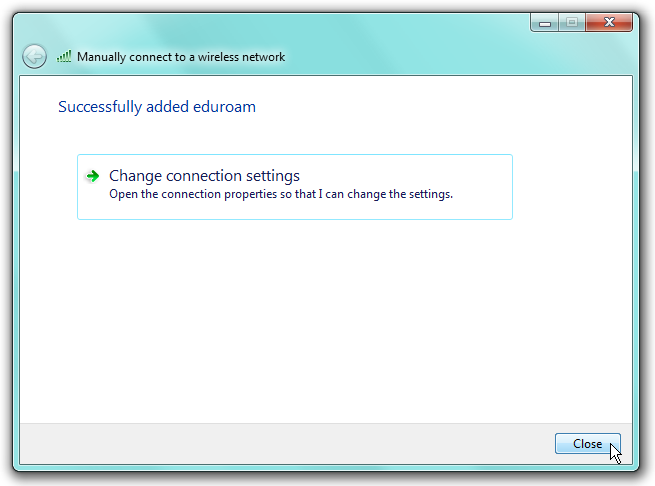
Once the wireless network eduroam connection has been added successfully, choose Change Connection Settings.
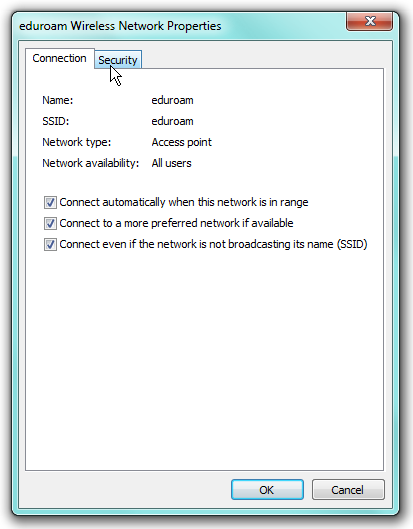
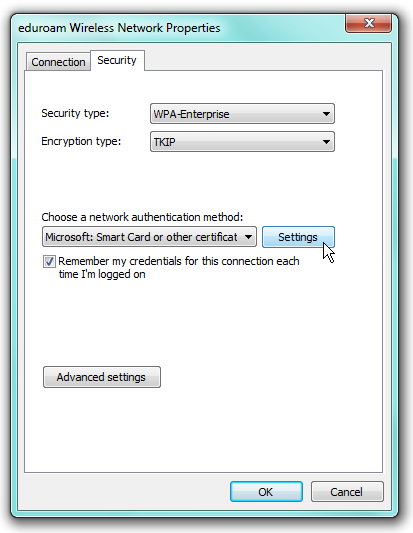
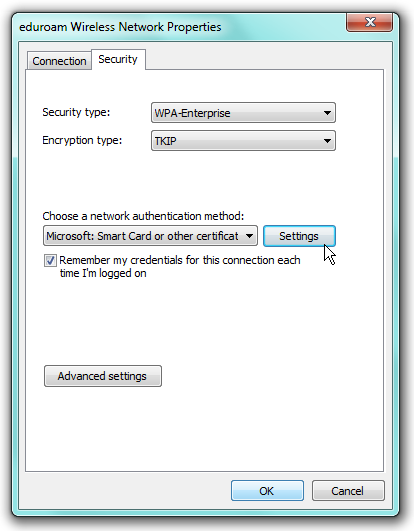
Under the Connection tab in the Wireless Network Properties window, be sure all three checkboxes are checked. Under the Security tab check the data entered when the network was added, choose a network authentication method, select Smart card or other Certificate, click the Settings button.
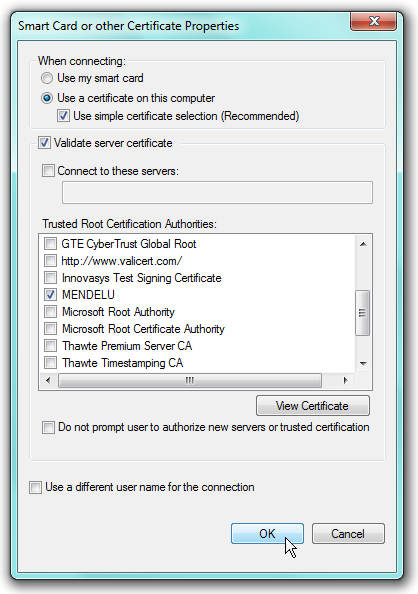
In Smart Card or other certificate window check Use a certificate on this computer -- Use simple certificate selection, then select the Validate server certificate check box and then in Trusted root certification authorities check MENDELU. The both windows confirm to click on OK button.
Close the dialog Manually connection to a wireless network
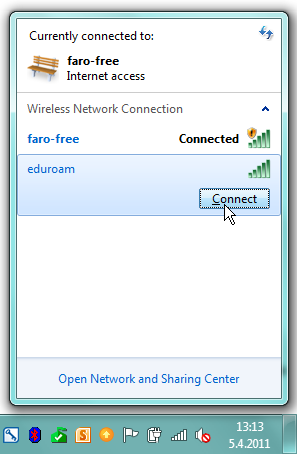
Again we get to start the Network Connections window, select the eduroam network and select Connect
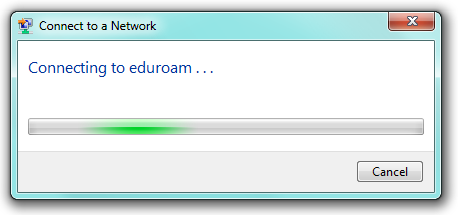
Now you see the dialog Connecting to eduroam
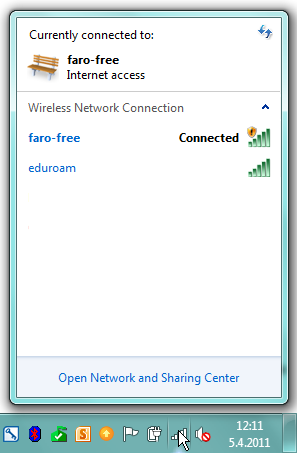
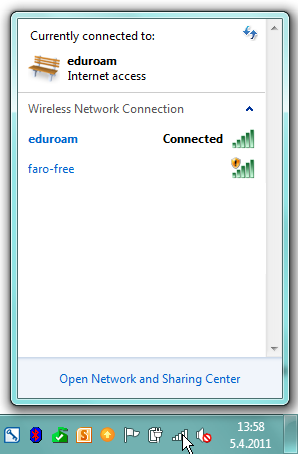
In the Wireless Network Connection we can check the successfull connection to eduroam.
Once you have connected to eduroam you can open your favourite Internet browser (Mozilla, Opera, Internet Explorer, etc.) and on the address line type URL of any webpage on the Internet, e.g. http://www.eduroam.cz. Apart from the most widely used service WWW, you can also use other Internet services such as SSH, TELNET, SMTP, POP3, FTP, etc. When connecting to the Internet, no public IP address is assigned.
